
Drill Guide: Different Nail Drill Bits Explained (Updated 03/09/2026)
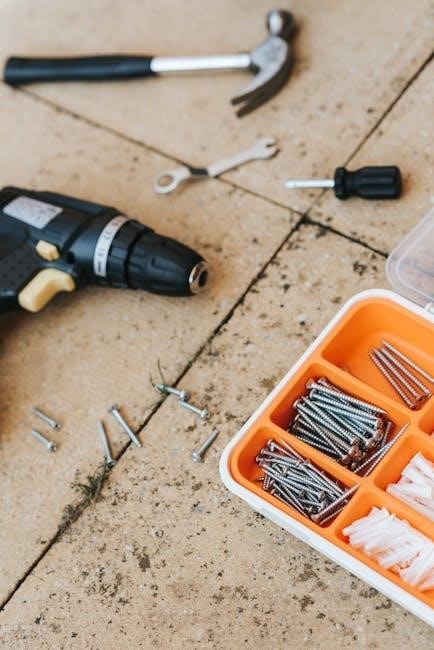
Essential tools for nail technicians, nail drills offer precision and efficiency, much like a sculptor’s hammer – a fundamental instrument for professional results.
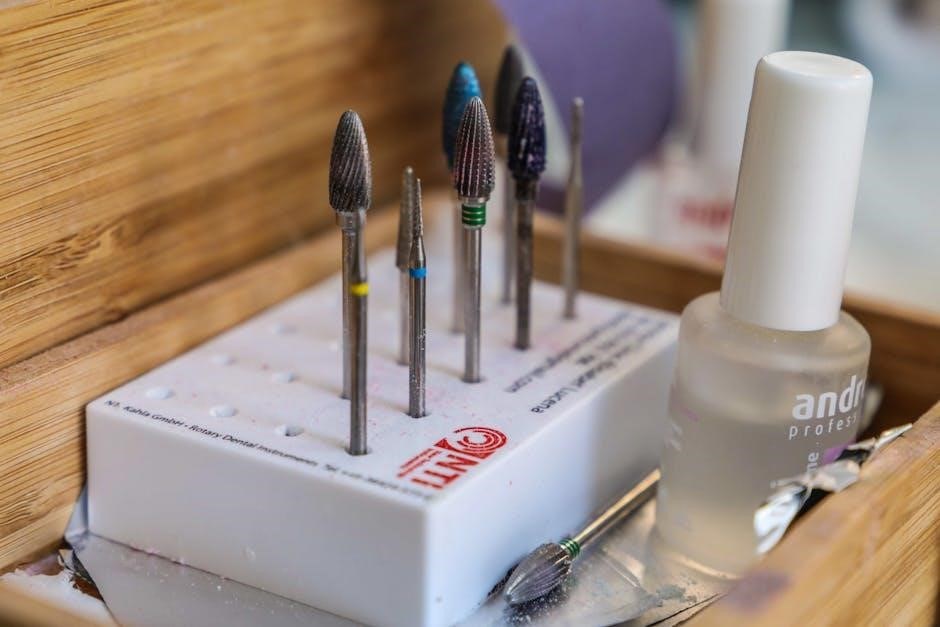
Nail drill bits are specialized accessories used with an electric nail drill (often called an e-file) to perform a variety of nail services. These bits come in numerous shapes, sizes, and materials, each designed for a specific purpose – from refining the cuticle area to removing product like gel or acrylic.
Understanding the different types of bits is crucial for any nail technician aiming to provide safe, efficient, and high-quality treatments. A nail drill, when used correctly with the appropriate bit, significantly speeds up procedures and allows for greater precision than manual filing alone.
Choosing the right bit isn’t just about the task; it’s also about the client’s nail health and condition. This guide will explore the diverse world of nail drill bits, helping you navigate the options and select the perfect tool for every job.
Why Use a Nail Drill?
Employing a nail drill offers substantial advantages over traditional hand filing. Primarily, drills drastically reduce service time, increasing efficiency for technicians and client satisfaction. The precision of a drill allows for meticulous work, particularly around the cuticle and sidewalls, minimizing the risk of damaging the natural nail.
Furthermore, drills excel at removing enhancements like acrylic and gel polish with ease, reducing filing dust and potential trauma to the nail plate. They also enable a smoother, more refined finish during shaping and surface preparation.
Essentially, a nail drill elevates the quality and speed of nail services, making it an indispensable tool for professional nail care.
Safety Precautions When Using a Nail Drill
Prioritizing safety is paramount when operating a nail drill. Always wear appropriate personal protective equipment (PPE), including safety glasses to shield your eyes from dust and debris, and a dust mask to prevent inhalation. Ensure clients are also protected with eyewear.
Never work on damaged or infected nails, and avoid applying excessive pressure, which can cause heat buildup and discomfort. Regularly inspect bits for damage – cracks or dullness – and replace them promptly.
Proper ventilation is crucial to minimize dust exposure. Thoroughly disinfect bits after each use, following manufacturer’s guidelines, to prevent cross-contamination. A steady hand and controlled movements are key to safe and effective drilling.
Understanding Nail Drill Bit Shapes
Nail drill bits come in diverse shapes – mandrel, barrel, cone, flame, and ball – each designed for specific tasks and offering unique functionalities.
Mandrel Bits
Mandrel bits are arguably the most versatile in a nail technician’s toolkit. They don’t actually cut themselves; instead, they function as a rotating shaft that securely holds various sanding bands. These bands, available in different grits, are responsible for the actual shaping, smoothing, and refining of the nail surface.
Using mandrel bits allows for customized abrasion levels, making them ideal for a wide range of procedures. From gentle cuticle work and product removal to surface preparation and smoothing acrylics or gels, mandrel bits offer exceptional control. The choice of sanding band grit dictates the aggressiveness of the treatment, ensuring a tailored approach for each client’s needs.
Proper band selection and technique are crucial for optimal results and preventing nail damage.
Barrel Bits
Barrel bits, characterized by their cylindrical shape, are workhorses for quickly removing product like gel polish or acrylic. They excel at surface work, efficiently reducing bulk without excessive heat build-up, a key benefit for nail health. Available in varying grits and head sizes, they offer adaptability for different nail shapes and areas.
These bits are particularly useful for shaping the natural nail, refining enhancements, and prepping the nail plate for new applications. The rounded shape allows for smooth, sweeping motions, minimizing the risk of gouging or creating uneven surfaces. However, caution is advised – improper use can lead to over-filing.
Skillful technicians leverage barrel bits for efficient and precise material removal.
Cone Bits
Cone bits, easily identified by their conical shape, are incredibly versatile tools favored for precision work and detailed sculpting. They’re excellent for refining the apex of acrylic nails, smoothing sidewalls, and creating crisp, clean lines. The pointed tip allows for targeted removal of product, making them ideal for intricate designs.
Available in various angles and grits, cone bits cater to diverse skill levels and tasks. Steeper angles are suited for more aggressive material removal, while gentler slopes offer greater control. They’re also effective for gently lifting the cuticle area during preparation.
Mastering cone bits unlocks a new level of detail in nail enhancements.
Flame Bits
Flame bits, resembling a flame in shape, are renowned for their smooth, sweeping motions and ability to create seamless transitions on the nail. They excel at blending acrylic or gel, refining the nail shape, and achieving a perfectly even surface. Their curved design minimizes the risk of gouging or creating unwanted lines.
These bits are particularly useful for softening edges and creating a natural-looking nail extension. They’re also favored for backfilling acrylics, ensuring a smooth and durable result. Different flame bit shapes offer varying levels of curvature, allowing technicians to customize their technique.
Flame bits are a staple for achieving polished, professional finishes.
Ball Bits
Ball-shaped drill bits are incredibly versatile, functioning like a miniature sanding tool for detailed work and smoothing. Their rounded form allows for precise control, making them ideal for refining the cuticle area, shaping sidewalls, and removing small imperfections on the nail surface.

These bits are particularly effective for gently smoothing out ridges or bumps, creating a flawless base for polish or enhancements. They can also be used to refine the apex of acrylic nails, ensuring structural integrity.
Ball bits come in various sizes and grits, offering flexibility for different tasks. Careful control is key when using ball bits to avoid causing damage to the natural nail.
Nail Drill Bit Materials
Nail drill bits are crafted from carbide, ceramic, diamond, or acrylic, each offering unique properties impacting performance, durability, and suitability for specific tasks.
Carbide Bits
Carbide bits are renowned for their exceptional durability and strength, making them a popular choice among nail technicians. These bits are manufactured from tungsten carbide, a very hard material capable of withstanding significant pressure and wear. They excel at removing product like gel or acrylic, and are particularly effective for shaping the nail and refining enhancements.

However, carbide bits generate more heat during use compared to other materials, requiring careful technique and moderate speeds to prevent discomfort to the client. They are generally more aggressive, so precision is key. Carbide bits are a cost-effective option, offering a good balance between performance and price, and are suitable for both beginners and experienced professionals.
Ceramic Bits
Ceramic bits are celebrated for their smooth operation and minimal heat generation, providing a comfortable experience for the client. Constructed from a fired ceramic material, these bits are ideal for delicate work, such as cuticle preparation and refining the nail surface. They are less aggressive than carbide, making them suitable for sensitive skin or thinner nails.
While durable, ceramic bits are more brittle than carbide and can chip or break if dropped or subjected to excessive pressure. They require a lighter touch and are best used at lower speeds. Ceramic bits are a fantastic choice for technicians prioritizing client comfort and precision, offering a refined approach to nail care.
Diamond Bits
Diamond bits represent a premium option in nail drilling, renowned for their exceptional durability and versatility. These bits feature tiny diamond particles bonded to a metal shaft, allowing for precise and efficient material removal. They excel at tackling tough tasks like removing calluses, gel polish, and acrylic enhancements.
Diamond bits come in various grits, catering to different needs – coarser grits for rapid removal and finer grits for smoothing and refining. While more expensive than other types, their longevity and effectiveness make them a worthwhile investment. Proper disinfection is crucial to maintain their performance and hygiene.
Acrylic Bits
Acrylic bits are specifically designed for working with acrylic nail enhancements, offering efficient shaping and refinement capabilities. Typically made from carbide or other durable materials, these bits come in a variety of shapes – including barrel, cone, and flame – to address different acrylic work needs.
They are excellent for lifting acrylic, smoothing out imperfections, and creating precise shapes. Using the correct grit is vital; coarser grits quickly remove bulk, while finer grits refine the surface. Acrylic bits require careful cleaning after each use to prevent acrylic dust buildup, which can reduce their effectiveness and lifespan.
Specific Nail Drill Bit Uses & Functions
Nail drill bits serve diverse functions, from meticulous cuticle work and safe callus removal to efficient gel/acrylic removal and precise nail shaping.
Cuticle Work Bits
Cuticle work is arguably where a nail drill shines brightest, offering unparalleled control and precision. These specialized bits gently lift and remove excess cuticle tissue, promoting healthy nail growth and a clean canvas for polish.
Under Rim Bits are designed to safely work under the cuticle, loosening dead skin without damaging the live tissue. They require a light touch and careful technique. Safety Cutter Bits, conversely, are used on the surface of the cuticle to carefully trim away hangnails and excess skin, offering a safer alternative to cuticle nippers.
Proper technique and bit selection are crucial to avoid injury. Always use low speeds and gentle pressure when performing cuticle work with a drill.
Under Rim Bits
Under Rim Bits are specifically engineered for delicate work beneath the proximal nail fold, targeting dead cuticle tissue without causing trauma to the healthy skin. Their rounded or tapered shape allows them to glide smoothly under the cuticle, effectively lifting and separating it from the nail plate.
These bits require a very light touch and slow speed – typically between 2,000 and 5,000 RPM. Incorrect usage can easily lead to cuticle damage or discomfort for the client. The goal isn’t to remove the cuticle entirely, but to gently lift and refine it.
Regular practice and a thorough understanding of nail anatomy are essential for mastering the use of Under Rim Bits, ensuring a safe and professional service.
Safety Cutter Bits
Safety Cutter Bits are designed as a beginner-friendly alternative to Under Rim Bits, offering a safer approach to cuticle work. Featuring a flat, shield-like end, they prevent accidental digging into the skin, minimizing the risk of injury during cuticle preparation.
These bits work by gently sweeping across the cuticle area, lifting and removing dead skin. They are ideal for technicians new to e-filing or those who prefer a more conservative cuticle removal method. A moderate speed – around 3,000 to 6,000 RPM – is generally recommended.
While safer, proper technique is still crucial; avoid applying excessive pressure and always move the bit with the direction of cuticle growth.
Callus Removal Bits
Callus Removal Bits are specifically engineered for addressing thickened, hardened skin around the heels and toes – a common concern in pedicures. These bits typically feature a coarse grit and come in various shapes, including cylindrical or diamond-coated designs.
Their primary function is to gently exfoliate and smooth away dead skin cells, revealing healthier skin underneath. It’s vital to use these bits with caution, employing light pressure and consistent movement to avoid causing discomfort or injury to the client.
Lower RPM settings (around 2,000-4,000) are recommended to maintain control and prevent overheating. Always work in one direction and avoid dwelling on any single spot for too long.
Gel & Acrylic Removal Bits
Gel and Acrylic Removal Bits are designed to safely and efficiently lift artificial nail enhancements without causing damage to the natural nail plate. These bits come in shapes like reverse tapers and football/tapered designs, often featuring carbide or diamond coatings.
The goal is to carefully break down the product bond, allowing for easier removal with a solvent or pusher. Avoid applying excessive pressure, as this can create friction and heat, potentially harming the nail.
Using a medium speed (around 5,000-8,000 RPM) and a light touch is crucial. Work from the cuticle area towards the free edge, gradually thinning the product.
Reverse Taper Bits
Reverse taper bits are a staple for gel and acrylic removal, distinguished by their conical shape that widens towards the tip. This design allows for controlled lifting of the product, minimizing stress on the natural nail.
They excel at getting under the edge of the enhancement, gently separating it from the nail plate. Use a sweeping motion, working from the cuticle towards the free edge, and avoid digging into the nail.
Carbide and diamond variations are common, with diamond offering a finer, more polished removal. Maintain a moderate speed and light pressure for optimal results and nail health.
Football/Tapered Bits
Football or tapered bits, resembling a miniature football in shape, are incredibly versatile for both gel and acrylic removal. Their design allows for efficient lifting and smoothing of product, making them a favorite among technicians.
These bits are particularly effective at refining the apex of acrylic nails and blending the transition area between natural nail and enhancement. Employ a side-to-side motion, maintaining light pressure to avoid heat build-up.
Available in various grits and materials, including carbide and diamond, they cater to different removal needs and desired finishes. Careful control is key to prevent damage to the underlying nail.
Shaping & Refining Bits
Shaping and refining bits are crucial for achieving perfectly sculpted nails, going beyond basic product removal to focus on form and finish. These bits excel at creating smooth, even surfaces and precise shapes, essential for a professional manicure.
They are used to refine the overall nail structure, correct imperfections, and prepare the surface for polish or further enhancements. Different shapes, like barrel or cone, offer varied capabilities for contouring and smoothing.
Technicians utilize these bits with a gentle touch, employing light pressure and controlled movements to avoid over-filing or causing damage to the natural nail. Precision is paramount for optimal results.
Smooth Top Bits
Smooth top bits are specifically designed to create a flawlessly even surface on the nail plate, preparing it for the final coat of polish or gel. These bits are characterized by their fine grit and smooth, rounded shape, minimizing the risk of scratching or damaging the nail.
They gently refine the apex of the nail, eliminating any bumps or ridges left behind by shaping or building products. This ensures a seamless transition for the top coat, enhancing its longevity and shine.
Using a light touch and slow speed is vital when employing smooth top bits, focusing on creating a polished, refined finish for a truly professional look.
Surface Preparation Bits
Surface preparation is paramount for long-lasting nail enhancements, and specialized drill bits are crucial for achieving optimal adhesion. These bits gently remove the shine from the natural nail plate, creating a textured surface that allows products like gel or acrylic to bond effectively.
Typically featuring a coarser grit than finishing bits, surface preparation bits come in various shapes – cone, barrel, or flame – to suit different nail contours. Careful application prevents over-filing and damage to the nail bed.
Proper technique involves light pressure and consistent movement, ensuring even texture across the entire nail surface for a durable and beautiful manicure.
Disinfection and Maintenance of Nail Drill Bits
Maintaining impeccable hygiene is non-negotiable when using nail drills. Thorough disinfection of bits after every client is vital to prevent cross-contamination and infection. Utilize a hospital-grade disinfectant specifically designed for nail tools, following the manufacturer’s instructions precisely.
Beyond disinfection, regular maintenance extends bit lifespan and performance. Remove nail dust and debris with a brush after each use. Periodically inspect bits for damage – cracks or dullness necessitate replacement.
Proper storage in a clean, dry environment also contributes to longevity. Avoid dropping bits, as this can compromise their balance and precision.
Choosing the Right Drill Bit for the Job
Selecting the ideal bit hinges on nail condition, desired outcome, and technician skill level; speed and grit are crucial considerations for optimal results.
Matching Bit to Nail Type & Condition
Careful bit selection is paramount, directly correlating with the client’s natural nail health and any enhancements present. For healthy, natural nails, finer grits and smoother shapes like smooth top bits are ideal for gentle shaping and cuticle work.
Brittle or damaged nails require extreme caution; utilize very low speeds and the finest grit to avoid further trauma.
Acrylic or gel overlays necessitate different approaches. Carbide bits excel at removing product, while ceramic bits refine and shape.
Always assess nail thickness and density – thicker nails can tolerate slightly more aggressive bits, but always prioritize client comfort and nail integrity.
Remember, a thorough nail assessment is the first step to a successful and safe service.
Drill Speed Considerations
Mastering drill speed is crucial for both efficacy and nail safety. Lower speeds (around 2,000-5,000 RPM) are best for initial product removal, cuticle work, and delicate shaping, minimizing heat build-up and potential damage.
Medium speeds (5,000-10,000 RPM) suit refining and smoothing tasks, offering a balance between speed and control.
Higher speeds (10,000-20,000 RPM) are reserved for robust product removal, but require a skilled hand and careful monitoring.
Always start with the lowest speed and gradually increase as needed, paying close attention to the client’s comfort level and the bit’s performance.
Pulse mode can further reduce heat and provide greater control, especially for sensitive clients.
Bit Grit Selection
Choosing the correct grit is paramount for effective and safe nail drilling. Lower grit numbers (coarse) remove product quickly but can cause more heat and potential damage, ideal for initial removal of thick acrylic or gel.
Medium grits offer a balance, suitable for shaping, refining, and smoothing surfaces. They are versatile for various tasks.
Higher grit numbers (fine) are perfect for finishing, polishing, and delicate work around the cuticle.
Always start with a coarser grit for removal and progressively move to finer grits for smoothing.
Consider the nail’s natural strength and condition when selecting grit – weaker nails require finer grits.

Advanced Nail Drill Techniques
Mastering e-file manicures, hard gel application, and acrylic overlays with a drill elevates skill, offering precision and efficiency for stunning nail artistry.
E-File Manicure
An E-file manicure revolutionizes traditional methods, prioritizing hygiene and efficiency. Begin by selecting appropriate bits – typically safety cutters or under rim bits – for cuticle work, ensuring a gentle approach. Carefully remove excess cuticle, avoiding skin damage.
Next, utilize a smooth top bit to refine the nail surface, creating a flawless canvas for polish. Remember to maintain a light touch and consistent speed. Proper bit selection and technique minimize trauma to the natural nail, promoting healthy growth.
This technique allows for precise shaping and a longer-lasting manicure, significantly reducing service time while enhancing the overall client experience. Always prioritize safety and sanitation throughout the process.
Hard Gel Application with a Drill
Utilizing a drill for hard gel application streamlines the process and enhances adhesion. Begin with a surface preparation bit to gently remove shine from the natural nail plate, creating optimal texture for gel bonding. Avoid excessive pressure to prevent heat buildup and nail damage.
Employ a smooth top bit to refine the apex and sidewalls of the gel application, ensuring a balanced and structurally sound enhancement. A fine grit carbide bit can be used for precise shaping and sculpting.
Drill usage minimizes filing time and ensures a consistently smooth finish. Proper technique is crucial; always work slowly and methodically, prioritizing nail health and longevity of the enhancement.
Acrylic Overlay with a Drill
A drill significantly speeds up acrylic overlay application, offering greater control and precision. Begin by using a surface preparation bit to gently etch the natural nail, removing oils and creating a textured surface for optimal acrylic adhesion. Caution is key – avoid excessive pressure.
Employ a barrel or ball-shaped bit to refine the acrylic bead placement, blending it seamlessly with the natural nail. A smooth top bit can perfect the apex and sidewalls, ensuring structural integrity and a flawless finish.
Drill use minimizes filing and dust, resulting in a quicker, cleaner application. Remember to prioritize nail health and utilize appropriate speeds and grits for a durable, beautiful overlay.